Step-by-Step Tutorial to Convert Image into PES Format
Introduction: From Picture to Perfect Stitches
You have a great image on your phone. Maybe it is your brand logo, a cute cartoon for a baby onesie, or even a photo you want to turn into a patch. You load it onto your USB stick, plug it into your Brother embroidery machine, and… nothing. The screen stays blank. Your machine acts like the file does not even exist.
I made this mistake when I first started. I thought any picture would work. But embroidery machines do not speak the language of pixels. They speak stitches. That is why you need to Convert Image To PES File Free using a process called digitizing. It sounds technical, but I promise you can do it. I will walk you through exactly how to take a simple JPG or PNG and turn it into a PES file that your Brother machine will love.
We will cover free online tools for quick projects, powerful software for when you want total control, and the one secret that separates a professional sew-out from a tangled mess. Grab your favorite image and let us get started.
Why Can’t I Just Rename My Image to .PES?
Here is the number one rookie mistake. Someone told you that changing the file extension might work. You rename your cat photo from cat.jpg to cat.pes. You rush to your machine. It still refuses to read it. You feel frustrated and confused.
Let me explain why this fails every single time. A JPG or PNG file contains pixels. Think of pixels as tiny colored squares. When you zoom in on a photo, you see those squares. Your computer screen knows how to arrange them to show a picture. Your embroidery machine has no idea what to do with a pixel. It does not see squares. It sees thread, needles, and moving hoops .
A PES file is completely different. It contains stitch data. This includes coordinates for every needle drop, instructions for when to change thread colors, commands for cutting the thread, and details about stitch density and direction . It is like a GPS route for your needle. Without that route, your machine just sits there confused.
So remember this golden rule. You cannot rename your way to a working embroidery file. You must digitize. And digitizing is exactly what we are going to learn right now.
What You Need Before You Start
Gather these three things before we dive into the step-by-step process.
First, your image file. PNG files work best because they support transparent backgrounds. That means no annoying white box around your design . JPG files also work, but make sure they have high contrast and simple colors. A blurry, low-resolution image will give you blurry, low-quality stitches. Aim for at least 300 DPI.
Second, a digitizing tool. I will show you both free and paid options. If you want to convert image to PES file free right now, you can use online converters like OnlineConvertFree or desktop software like Ink/Stitch .
Third, patience and scrap fabric. Always test your converted file on old fabric before stitching your final project. Trust me on this. I have ruined good shirts by skipping the test run.
Method 1: Convert Image to PES File Free Using Online Tools
This method is for you if you want speed and simplicity. Maybe you have a simple logo or a basic shape. Online converters work in your browser with no software installation.
Step 1: Find a Reliable Free Online Converter
Look for tools that have SSL encryption and auto-delete your files after conversion. I recommend OnlineConvertFree or similar platforms that support PES output . Avoid sites that ask for email signups or try to install weird plugins.
Step 2: Upload Your Image
Click the upload button and select your JPG or PNG file. Most converters let you drag and drop directly onto the page. Keep your file size reasonable. Huge images take longer to process and often create messy stitch files.
Step 3: Select PES as Your Output Format
From the dropdown menu of supported formats, choose PES. Some converters also offer DST or other embroidery formats, but for Brother machines, PES is your target .
Step 4: Adjust Basic Settings
Some advanced online tools let you tweak a few settings. You might see options for stitch density, color limits, or design size. If you are new, leave these at default. If you have experience, reduce the color count to save yourself from constant thread changes. Five to six colors is a sweet spot .
Step 5: Convert and Download
Click the convert button. Wait a few seconds. Download your new PES file. Save it to a USB drive formatted for your Brother machine.
The Honest Truth About Free Online Converters
I need to be straight with you. Free online tools are great for simple designs. A solid heart, a basic star, a one-color silhouette. They fall apart on complex artwork. Small text gets blurry. Gradients turn into a mess. Overlapping colors cause thread breaks and bird-nesting .
If your design has multiple colors, thin lines, or small lettering, skip the free converters. They will waste your thread and your patience. Move to Method 2 or Method 3 instead.
Method 2: Use Free Software for Full Control (Ink/Stitch)
This method takes more time to learn but gives you professional results without spending money. Ink/Stitch is an open-source plugin for Inkscape, which is also free. It runs on both Windows and Mac, making it perfect for users who want to convert image to PES file free on a Mac .
Step 1: Install Inkscape and Ink/Stitch
Download Inkscape from their official website. Install it. Then download the Ink/Stitch plugin and follow the installation guide. Both are completely free. No trials. No hidden fees.
Step 2: Import Your Image
Open Inkscape. Drag your JPG or PNG file into the workspace. Use the zoom tool to inspect the edges. If your image looks pixelated or jagged, you may need to clean it up first.
Step 3: Trace the Image to Create a Vector
Before you can add stitches, you need a clean outline. Inkscape has a Trace Bitmap tool. Select your image, open the Path menu, and choose Trace Bitmap. Adjust the threshold until the outline looks sharp. This converts your pixel image into a vector path that Ink/Stitch can understand .
Step 4: Assign Stitch Types
This is where the magic happens. Using Ink/Stitch tools, you tell the software how to sew each part of your design.
For borders and text, use satin stitches. These create a smooth, shiny edge.
For large filled areas, use tatami or fill stitches. These cover space efficiently without adding too much bulk .
For thin lines, use run stitches or bean stitches. These follow the path of a line without over-sewing.
Step 5: Set Stitch Direction and Density
Do not let the software guess. You control the angle of your stitches. For a circle, radiating stitches from the center work well. For a long rectangle, horizontal or vertical fills make sense. Density controls how close together the stitches sit. Too dense, and your fabric puckers. Too loose, and you see gaps. Start with default values and adjust after testing.
Step 6: Export as PES
Once you have assigned stitch types to every part of your design, go to the Ink/Stitch menu and choose Export. Select PES as your format. Save the file to your computer.
Step 7: Test on Scrap Fabric
Load the PES file onto your Brother machine. Hoop a piece of scrap fabric with appropriate stabilizer. Run the design. Look for gaps, puckering, or thread breaks. Go back to Ink/Stitch, tweak your settings, and export again. Testing is not optional.
Method 3: Professional Software (For When You Want the Best)
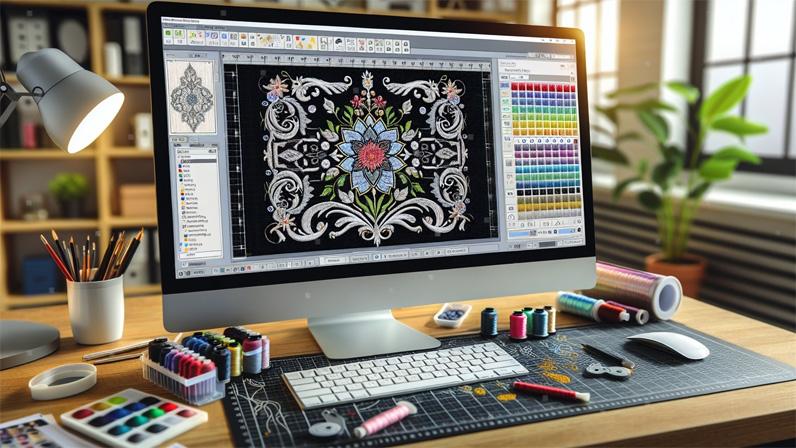
If you digitize frequently or run a small business, invest in software like Wilcom Hatch, Brother PE-Design, or Embrilliance. These programs cost money but offer auto-digitizing features that save hours of manual work.
The process is similar to Ink/Stitch but more polished. You import your image, click an auto-digitize button, and the software suggests stitch types and paths. You still need to review and tweak, but the heavy lifting happens automatically .
Brother PE-Design is a natural choice since Brother created the PES format. It syncs wirelessly with newer Brother machines and matches thread colors perfectly .
Why Your Converted File Might Fail (And How to Fix It)
You followed the steps. You converted your image. But the sew-out looks terrible. Let me help you troubleshoot the most common problems.
Problem one: Gaps between colors. Your design has a red shape with a black outline, but the black stitches float away from the red. This happens when your software lacks pull compensation. Fabric stretches under the needle. Professional digitizing software adds extra width automatically. Free tools often skip this. The fix is to manually widen your satin stitches or switch to paid software .
Problem two: Bird-nesting. A huge clump of thread tangles under the needle plate. This usually means your file has too many jump stitches or missing trims. The machine tries to move across large gaps without cutting the thread. Open your file in a viewer and look for long horizontal lines between design elements. Add trims or reorganize your stitch path .
Problem three: Design looks blocky or jagged. Your original image had low resolution. The software tried to follow blurry pixels and created staircase edges. The only fix is to start with a cleaner image. Re-draw your logo in vector format before digitizing .
Pro Tips for Great Results Every Time
Here is what I have learned after hundreds of conversions. Use PNG files with transparent backgrounds whenever possible. The software sees only your design, not a white box around it . Keep your design size reasonable. Do not digitize a 10-inch logo if you only have a 4x4 hoop. Match your stitch density to your fabric. Light fabrics need lighter density. Heavy fabrics like denim or caps need more density and stronger underlay .
And always, always test on scrap first. I cannot say this enough. Testing saves fabric, thread, and sanity.
Conclusion: You Are Ready to Stitch Anything
You started with a simple picture on your phone or computer. Now you know how to turn that picture into a real, stitch-ready PES file for your Brother embroidery machine. You learned why renaming files does not work. You discovered free online converters for quick projects. You explored Ink/Stitch for full control without spending money. And you picked up troubleshooting tips for when things go wrong.
The best way to learn is to do. Pick a simple image today. A basic shape or a one-color logo. Use one of the free methods I shared. Convert that image to a PES file. Load it onto your machine. Stitch it out on scrap fabric. See what works and what needs adjustment.
Every expert digitizer started exactly where you are now. With a picture, a machine, and the determination to figure it out. Go make something beautiful. Your Brother machine is waiting.